
Recently I went to upgrade one of my Ubuntu servers to 22.04 from 20.04 (I know I’m behind), and was informed during the process that I did not have enough space available on /boot in order to install the 22.04 upgrade. I looked for old kernels to remove and other things to remove, but the whole partition was only like 243MiB or something like that and it said I needed an additional 500MB to perform the upgrade.
As usual, since I am about as good at managing Linux as I am at flying a hot air balloon, I immediately took to searching around for answers on how to expand /boot. I found all sorts of folks with many different options for me to try, from creating a new partition in a different section of the disk for /boot to live and re-point GRUB at that location, to other options like ‘Just boot with a Live CD and use the slider in gparted to expand it’ (which I could not get to work). I struggled with this for quite a while, trying a bunch of different solutions that didn’t seem to work for me. I could get the adjacent LVM drive, and the partition around it shrunk using commands like lvresize, pvresize, and pvs (link to a useful askubuntu.com here https://askubuntu.com/questions/196125/how-can-i-resize-an-lvm-partition-i-e-physical-volume), but I couldn’t get the adjacent partition ‘moved to the right’ in gparted in order to add space to sda1 where /boot lives to expand it.
After struggling with this for way longer than I should have (several hours) I actually came across a pretty simple fix that worked fantastically and I didn’t find anywhere else – either because I’m doing something batshit crazy and by some miracle it actually worked – which I don’t know is true or not, or it’s something so stupidly simple and commonplace that no one has documented it because no one felt the need to document something so basic.
Anyway, here was my solution to expanding sda1 and therefore /boot. One thing to note that is pretty important here, the neighboring partition housed only an LVM drive. Also important, I’d recommend taking a snapshot or backup of the machine before doing this. Like I said, it’s entirely possible that this whole procedure is exceptionally risky and I only got lucky when I did it.
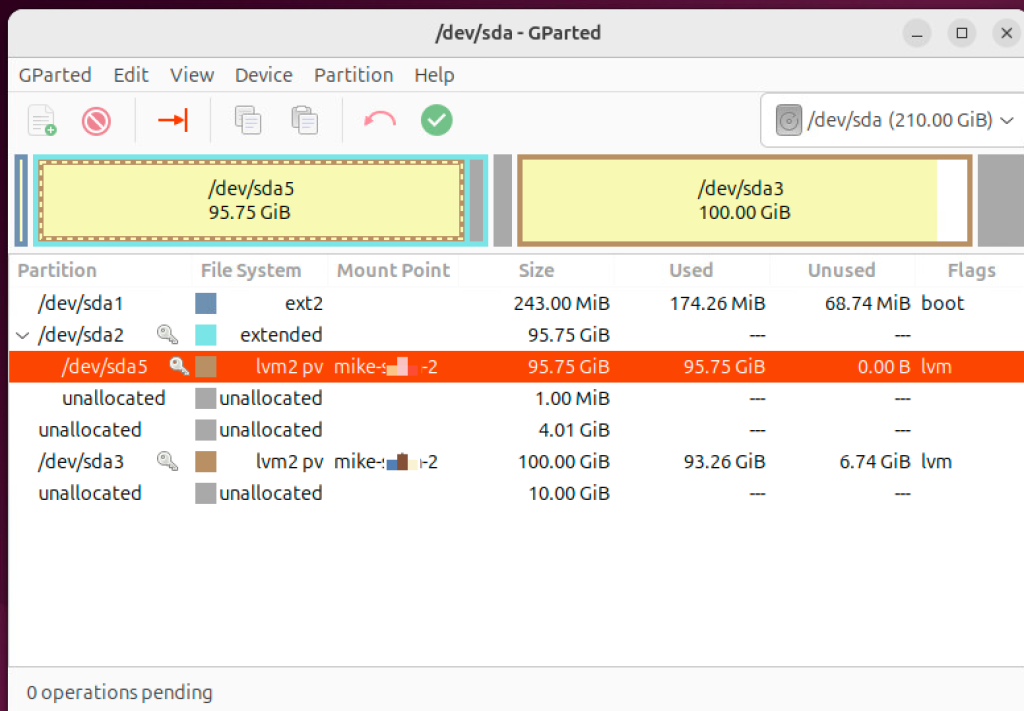
Boot into a Live CD, I think anytime you’re working with /boot this is going to have to be the route, but also attach a second (temporary) disk to the machine (mine is a VM) that is sized to hold the entire neighboring LVM drive, in my case 100GB. Once booted, I made sure to open gparted and take a screenshot before I started anything, you will likely need to use this to recreate your drive structure at the end. For simplicity, don’t pay any attention to sda3, that is not involved in the process here.
Now, open up a terminal and add the new temporary disk to the LVM and expand your LVM to it using the below commands.
lsblk or sudo fdisk -l (list available disks)
sudo pvcreate /dev/sdb1 (replace sdb1 with your disk name)
sudo vgextend <your-vg-name> /dev/sdb1 (again replacing sdb1 with your disk name)
Ok, you’ve added the temporary drive to your Volume Group (VG), but you haven’t expanded the Logical Volume (LV). At this point I used pvmove (https://linux.die.net/man/8/pvmove) to move the entire contents of the LVM drive (sda5) that is adjacent to my sda1 (housing /boot) to the new temporary drive I just added to the group.
pvmove /dev/sda5 /dev/sdb1Next, I removed sda5 from the Volume Group and removed the LVM metadata from it.
sudo vgreduce <your-vg-name> /dev/sda5 (replace sda5 with your disk name)
sudo pvremove /dev/sda5 (replace sda5 with your disk name)
From there I used gparted to delete the partition (sda2) that had been housing sda5, which left all sorts of space for me to extend sda1 (housing /boot) to. I used gparted to add an extra 4GB to the end of sda1 (that’s how much I expanded the virtual hard disk in VMware to accommodate this expansion) and then went about the task of reversing everything I had just done. I made sure to recreate the partition (sda2) and LVM drive (sda5) using the same naming and disk numbers that it had previously, even temporarily creating an sda4 (which no longer existed) before recreating my new LVM drive (sda5) to make sure that it got the name sda5. I assume that if the labels wouldn’t be the same, there would be some level of catastrophe that would happen upon booting the machine up again.
sudo pvcreate /dev/sda5 (replace sdb5 with your disk name)
sudo vgextend <your-vg-name> /dev/sda5 (again replace sda5 with your disk name)
pvmove /dev/sdb1 /dev/sda5
sudo vgreduce <your-vg-name> /dev/sdb1 (replace sdb1 with your disk name)
sudo pvremove /dev/sdb1 (replace sdb1 with your disk name)
From there I shut down, ejected the Live CD, removed the temporary virtual hard disk that I’d attached to the VM to store that LVM drive data temporarily and booted the machine back up. I expected kernel panic and/or all sorts of alarm bells but it booted up without issue, recognized the new larger sda1 and I took the opportunity to upgrade to 22.04, which went off without issue. I think I’ve said it a couple of times already, but I am in no way, shape, or form a linux expert and this could be a super risky procedure (I literally have no idea), but it seemed to work for me, much to my surprise. Hope it works for you too!


Leave a Reply